Much has been written about workflow for photographers. There are even applications that claim to help you organize your workflow. Here is a description of my current workflow and a short description of the tools I use in my workflow.
My camera records the images in RAW mode. Even if you do not know how to do raw processing, it is a good idea to record this way. I can go back and do raw processing for photos that I took years ago, before I understood the possibilities of raw, because my camera was recording the data and I saved it.
My goal in the photography is to get the photo in the camera as close to the final version as possible. In general, it takes more time to deal with something in post processing than at the beginning. For example, when I take photos of models, I ask the makeup artist to be sure to cover any blemishes. This takes only a few minutes of makeup time. However, when multiplied by all of the photos that we take, the time to fix a zit adds up. For a friend’s wedding I photographed, I got to know every zit on everybody, because I went through removing them in several hundred photos. This was hours of zit removal. It is a good thing that she is a special friend. I would not do this for just anybody unless they were paying me by the hour.
When I get to my computer, I copy the photos off of the memory card and onto my computer. I then do a backup. Before anything else happens, I want to know that the pictures exist in at least two places. Later, they will be backed up again and end up in at least four places. My paranoia is justified, because many disk drives have failed on me. However, I rarely lose much, if any, data in a disk failure because of my backup paranoia. Disk space is cheap.


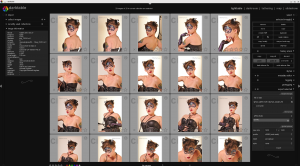
In darktable, I set the proper white balance, adjust brightness, contrast, and similar exposure adjustments. I might rotate the image to straighten it and crop the image if needed. I also do simple sensor dust removal if required (another thing that is much faster to deal with by keeping a clean sensor). In many cases, this is all I do to the photo, and I have spent, at most, five minutes. After all, I was working really hard to ensure that the photo was good in the camera. In this case, I export a JPEG image for general use. Darktable stores its adjustments in a .xmp sidecar file, similar to many other programs. This means that the adjustments are non-destructive and nothing is modifying the original RAW file.
For some photos, I use darktable to add a watermark, and I export the watermarked photo at a reduced resolution for use on social media. Since I assume that my photos will be stolen whenever they appear on the web, I use the watermark so I at least get credit for the photo. A person skilled in photo editing can remove the watermark. However, if they are willing to go to that work for a screen-resolution image, they need to get a life. In non-commercial situations, I normally give permission for use when asked, so they are spending more time on the image theft than they would if they were honorable.
If additional editing is needed, it is time to switch to the GIMP. In this case, I will export a TIFF image from darktable, and that is what I open for editing. The GIMP supports layers and all the types of editing you can do in Photoshop. This is where I remove zits, soften wrinkles, and do editing such as removing objects from a photo. I save the file in the GIMP’s native format (.xcf), as well as exporting a JPEG for general use.
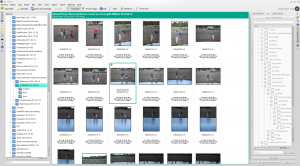
Now that I am happy with the processed images, I go back to digiKam. All of my photos get a title and caption. I also add keywords (tags), and add my copyright information into the file’s metadata. Again, this helps to know where my photos are used when they are stolen. It also helps honest people contact me to ask for permission, since my contact info appears in the metadata of every photo.
At this point, I am done. If the photos are for a customer, I upload them to a password-protected page on my web site and send the customer a message with instructions on how to get the photos. I also do another backup or two.
You might have noticed that everything that I list above is open-source software. This means that (a) it is free (as in both beer and speech), and (b) probably better-supported than most commercial software. Given that my image-processing computer is running OpenSUSE, a flavor of the GNU/Linux system, these are nearly the only choices. The good news is that digiKam beats any other software for its tagging—I have tried them all, and there is absolutely nothing that is better. Few even come close. Darktable and the GIMP are easily the equal of their commercial competition. In fact, university research into new image processing algorithms occurs in open source programs and then ends up in commercial products such as Photoshop. Admittedly, Adobe has their own research team. However, any good ideas rapidly propagate into the open-source alternatives.